How to install DirectAdmin

Do you want to host your websites on your own server? Then DirectAdmin might be the solution for you. In our opinion, DirectAdmin is one of the best control panels out there. It’s cheaper than cPanel and Plesk and easy to install.

We’ve created this knowledgebase article to help you to install DirectAdmin.

Step 1. Check if you meet the system requirements

For the DirectAdmin installation, you will need a clean operating system.

We recommend you to use AlmaLinux 8 & 9 or Debian 11. From our experience, these operating systems are the most stable to use.

You will need at least 1 Core, 1GB RAM, and 20GB of storage.

If you have a DirectAdmin license from your hosting provider, you can ask them if the correct Operating System is set.

If you have bought your own license directly from DirectAdmin. Make sure to save the License key, as you will need this to activate DirectAdmin. Below you will see a screenshot where you can find this information.

Step 2: Server preparation

Before you start the installation, you need to make sure that you have the correct operating system and that the server is up to date.

With the following command, you can verify our operating system:

cat /etc/os-release

Now that you know which operating system you have, you need to do a few more things in preparation.

When you have Almalinux follow the steps in the following article How to update AlmaLinux.

When you have Debian 10 or 11, follow the steps in the following article How to update Debian 11

We recommend you to use a hostname for your VPS so you can secure the DirectAdmin login with SSL. The hostname refers to the URL for your server. If you have your own domain, then you can create a DNS record for server01.mydomain.com: your server IP address.

If you don’t use a hostname you get a login URL with HTTPS/SSL from DirectAdmin.

Step 3: DirectAdmin installation

Now it’s time to start with the Directadmin installation.

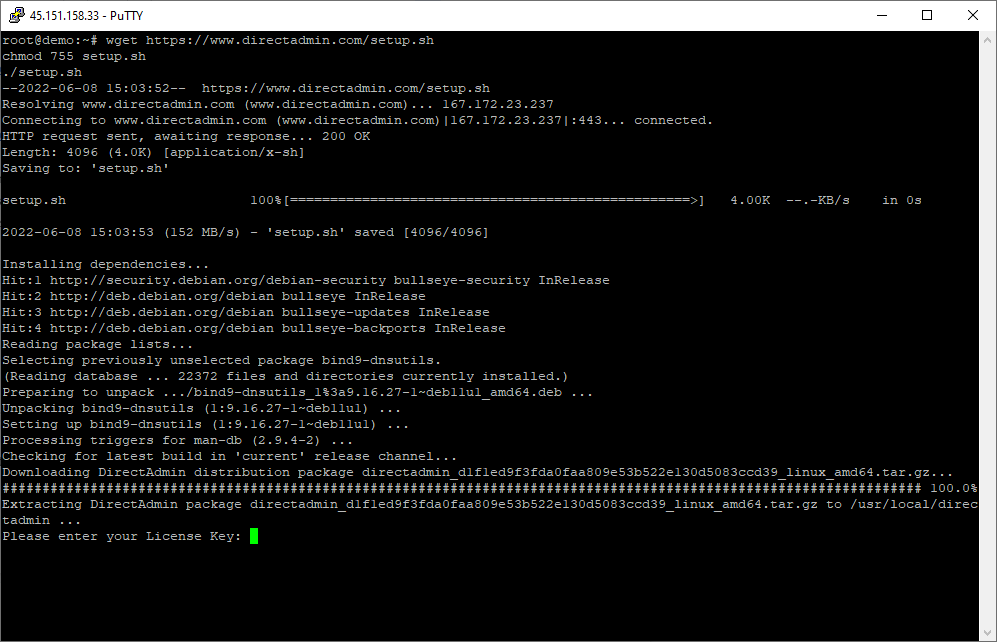
With the following commands, you will download the installation file and start the installation:

wget https://www.directadmin.com/setup.sh
chmod 755 setup.sh ./setup.sh

Once you run these commands some information will be downloaded. After a minute, the installation asks for a License key. You get this key from your hosting provider or from directadmin.com directly.

Recommended DirectAdmin settings

Below you will find the settings that we recommend you to use:

Default config: no

Webserver: apache

We recommend using apache, which provides the best performance for web hosting on a normal server. 

Database Server: MariaDB

We recommend using MariaDB

Database Version: Default ( hit enter)

FTP server: pureftpd

Default PHP version: 8.0

If you are using a known CMS system like WordPress, or Joomla you can use PHP 8.0. If you’re running your own PHP code or CMS then you will need to check if it supports PHP 8.0. If not, then you can choose 7.4.

Default PHP version: php-fpm

We will be using PHP-fpm for the processing, php-fpm gives you the availability to tweak the server and add more PHP versions.

Second PHP installed: no

If you want to use another PHP version you can choose that version. 

ionCube: yes

opCache: yes

Zend Guard Loader: yes

Exim: yes

Dovecot: yes

phpMyAdmin: yes

This allows you to manage your database in an online portal

SquirrelMail: no

We recommend not using this webmail because it’s not up to date.

RoundCube: yes

Is for the webmail if you want to host your own email

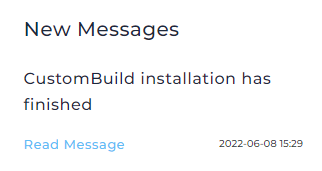
Now you have to wait for 30 to 60 minutes before the installation is successful. How long this process takes depends on your server performance. 

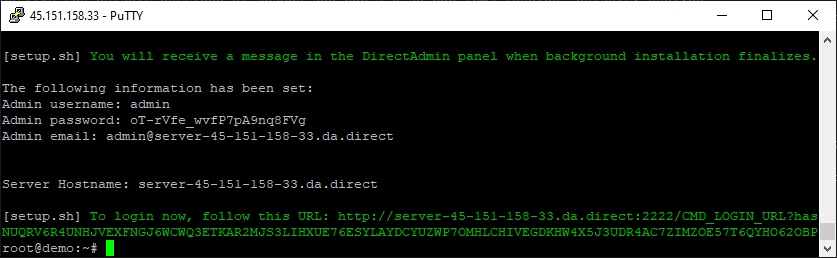
In the terminal, you will see the login details for the DirectAdmin control panel.

If you want to check if the installation was successful, you can log in to the DirectAdmin control panel. On the bottom right-hand corner, you should see new messages. One of them looks as follows:

CustomBuild installation has finished

DirectAdmin Installation Finish

Step 4: Let’s Encrypt (SSL)

If you have created a DNS record for your hostname and you can log in with the URL, then you can create a free SSL certificate.

To ensure that all important services such as Directadmin, mail server, and FTP are provided with an SSL certificate, the following command must be used:

cd /usr/local/directadmin/scripts

./letsencrypt.sh request_single hostname 4096

Example: ./letsencrypt.sh request_single server.hostio.solutions 4096

Once the SSL is installed from Let’s Encrypt you can access your server with your own URL.

Summary

We hope that our knowledgebase article helped you with installing DirectAdmin on your server. If something does not work or has changed in the installation, please let us know so that we can update our article.

Do you want a managed VPS solution with Admin access?

Contact us and we’re happy to help! 

Contact us

Share this with someone who'd like to read this

Recent Posts

How to update DirectAdmin

Updating DirectAdmin is necessary to ensure that your system has the most recent security updates. If you have an unmanaged VPS or dedicated server, you will probably

Read More

How to update AlmaLinux

Like any other distribution, it’s important to update your AlmaLinux system. By keeping your AlmaLinux system up to date, you will be sure to have the latest

Read More